
How to Reduce Image File Sizes
Share this Article:
![]()
![]()
Often images make up a large proportion of the size of a web page, if you have already chosen the correct image format then the next steps are finding the right dimensions and compression for your images.
Image Dimensions
The image dimensions refers to the size of an image in terms of the number of pixels wide and tall it is. A pixel has no fixed size and can grow or shrink depending how an image is displayed. On a web page an image will normally be adjusted so that it fits the space that has been allocated to it.
Images that are too small will appear boxy or pixelated and are normally easy to spot.
On the other hand, images that are too large will not be immediately obvious, you may find that you are using images much larger than you really need.
An easy way to spot oversized images is to visit a page on your website, go to an image and right click on it. From the menu select “Open image in new tab”.
If the image that opens in the new tab appears much larger than it is displayed on your website then you probably want to change the dimensions of your image. (Sometimes when you open the image and hover over it the mouse pointer will appear as a magnifying glass, in this case click the image to see it at full size).
Top-Tip: Image dimensions and resolution are sometimes confused, resolution affects the printed size of an image but won’t make any difference to an image on screen or to its file size.
Choosing the Correct Dimensions for an Image
Finding the correct image dimensions can be tricky. An image that looks good on a small screen might look pixelated on a large screen. Meanwhile an image that looks good on a large screen will be unnecessarily large for a small screen.
There are advanced techniques that will allow you to display different sized images to users with different sized screens, this is the most efficient way, but it will probably require you to do a bit of coding.
A little bit of trial and error might be required to get the right image size, but here are some useful guidelines to get you started based on what the image will be used for:
- Background image: If the image is to cover a full page background then a maximum width of 1920px is big enough.
- Header images: Again if these fill the whole width of a page then 1920px is a good bet.
- Logo images: Normally these images are much smaller, a size of 300px wide will often work well.
- Other images: Normally images are narrower than the full page width so 960px can be a good starting point.
If you want a more accurate idea of how big an image is displaying on your screen you can right click on it and select “Inspect” from the menu. A shaded box will appear around the image and the dimensions will be displayed in the top right (ie 300 x 150). You can use this information to help you choose an appropriate image size.
How to Change the Dimensions of an Image
Fortunately changing an image’s dimensions is much easier than choosing the correct dimensions!
The easiest method is probably to use the Squoosh app. The app was develop by Google, whilst it is accessed through a web browser it actually runs locally on your computer so your files aren’t transferred to the internet at any point.
If you’d prefer to use in-built software on your computer then both Windows and Mac machines come with software included that allows you to change image resolution.
On Windows:
Open an image file using Photos, this is normally the default software for opening images, so simply double clicking the file should be enough. (If Photos is not the default you can right click the file, go to “Open With” and select “Photos”).
Once the image is open right click on the image and select “Resize” from the menu, this option is also available in the extended menu in the top left.
You can select one of the three pre-set sizes for the image or enter a custom value by selecting the custom option.
Compression
Compression is a great way to reduce the file size of raster image formats (JPEG, PNG or WebP). Generally, compression works by reducing some of the detail or the number of colours in the image. For photographs large reductions in file size can be achieved with no real visible loss in quality.
However, as the level of compression increases the loss of quality becomes more apparent.


Image quality decreases as compression increases on a jpeg image.
How to Compress an Image
As with changing the resolution of an image the compression can also be easily changed in the Squoosh app, Squoosh also has the advantage that you can see the changes happening live. Alternatively you can also use software on your computer to do the job.
If you have specialist image editing software such as Photoshop or Lightroom you will be prompted to choose the compression or image quality when you save a file.
Top Tip: For JPEG and lossy WebP images compression is irreversible so it’s always best to save the compressed image as a new file in case you want to go back to the original later.
On Windows:
Open an image file using Photos, this is normally the default software for opening images, so simply double clicking the file should be enough. (If Photos is not the default you can right click the file, go to “Open With” and select “Photos”).
Once the image is open right click on the image and select “Resize” from the menu, this option is also available in the extended menu in the top left.
To only change the quality, or compression, of the image select Custom and then adjust the quality slider to the desired amount.
Once complete save the image as a new file.
On Mac:
The default software that comes with a Mac does not have allow for image compression.
Amount of Compression
Choosing the right amount of compression is down to personal preference and the content of the image.
Typically, images that have a limited colour palette will compress with less noticeable loss in quality compared to images with a wide colour range.
As a starting point I would always recommend 80% compression, generally I have found no noticeable loss in the quality of photographs at this amount of compression, and it yields comparatively large reductions in file size.
After this point you can continue to compress the image until you feel you have reached the point were you no longer wish to compromise the image quality any further. If you are using the Squoosh app then you can see the changes live.

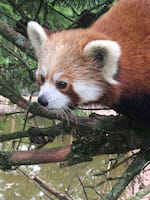

Image 1, 2 and 3

The graph above shows the reduction in file size relative to the amount of compression applied for 3 different images. It shows that a small amount of compression can provide a disproportionately large reduction in file size.
Typically a compression of 20% (or a quality setting of 80%) results in an average file size reduction of around 40%.
(Original images used to create the graph were 3042 x 4032px)
Top Tip: If you are designing your own graphics consider the number of colours you are using. An image with 5 colours will have a smaller file size than one with 50 colours. If using raster image formats be particularly wary of gradients!
Next Steps
Your images should now be perfectly optimised for your website!
Want to know how sustainable your website is? Learn more about No Lesser Panda’s website sustainability audit.
You are here: Home / Articles / How to Reduce Image File Sizes